Agile manufacturing for rapid product development
Editor’s Note: Electrical and computer engineer Mehrdad Majzoobi has spent more than a decade developing hardware products, conducting research, founding companies, and mentoring hardware entrepreneurs. He’s also given talks at Supercon and Circuit Launch on agile manufacturing techniques. Here he shares pearls of wisdom learned through developing his latest product, Ubo Pod.
Unlike other products I developed in the past, I took a different approach to develop Ubo Pod, the open source, hackable, personal AI assistant powered by Raspberry Pi. For this product, I came up with an agile methodology. The approach allowed me to adapt and move faster, keep costs down, and recover gracefully from mistakes — without compromising the build quality.
In this post, I share some of the agile manufacturing techniques I used to bring this product from concept to production. You may adopt some of these techniques in your product development journey.
To learn more about the product you can check out my website and upcoming Kickstarter campaign.
Modular design
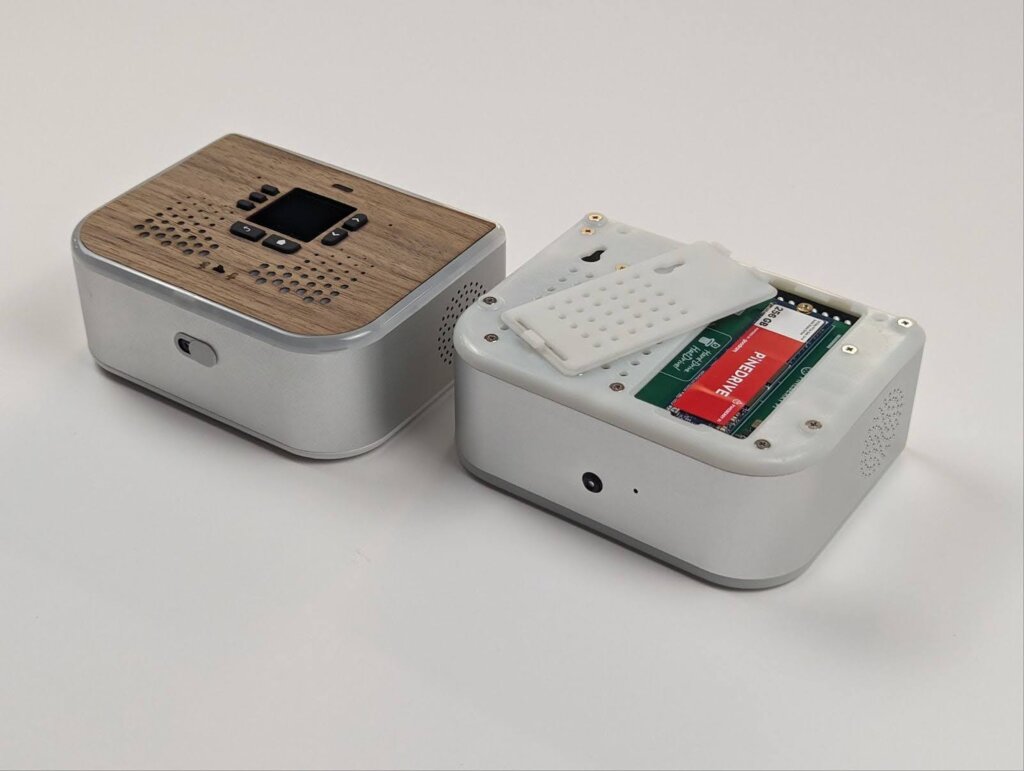
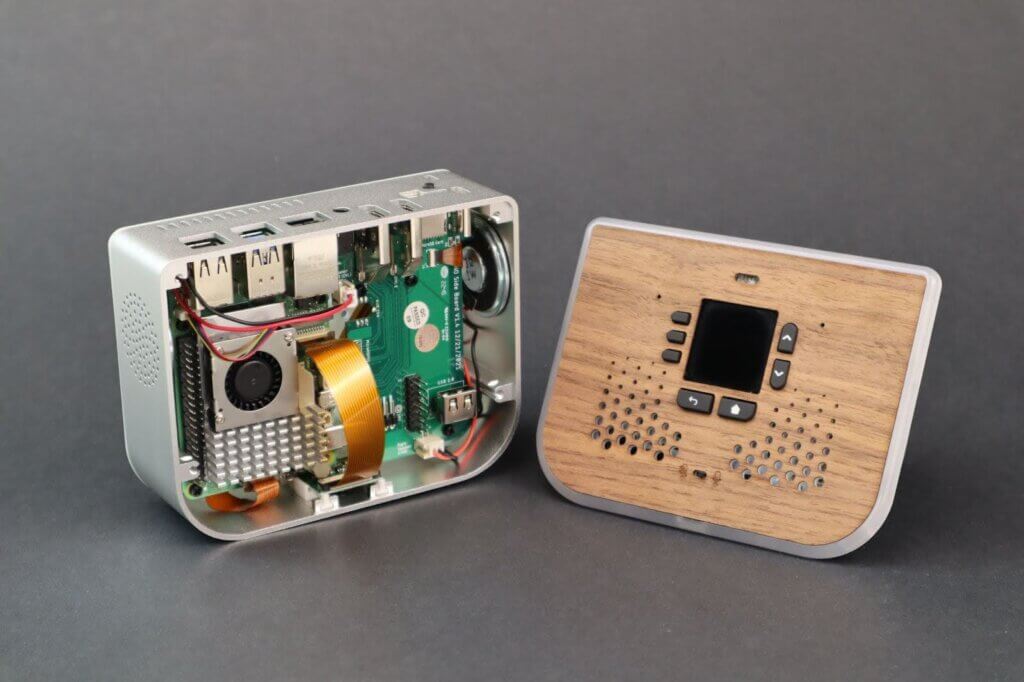
I wanted to build a foundation that I could reuse for the future generations of the products, rather than doing a one-off design. The modular design also helps with separating concerns and makes the product easier to repair. It also allows maximum customizability through swapping the building blocks and modules to build different derivative products and trims.
The image below shows the top module detached from the enclosure:
Aluminum extrusion
I’m personally not a big fan of plastic enclosures, as they can be brittle and give products a cheap look and feel. Working with plastic also often requires injection molding, which can be quite expensive to tool.
Aluminum is an excellent material for building enclosures. It can be die cast, but tooling can be very expensive. Another option is to CNC aluminum, but CNCing a big block of aluminum takes a long time and leads to a very high per-component cost.
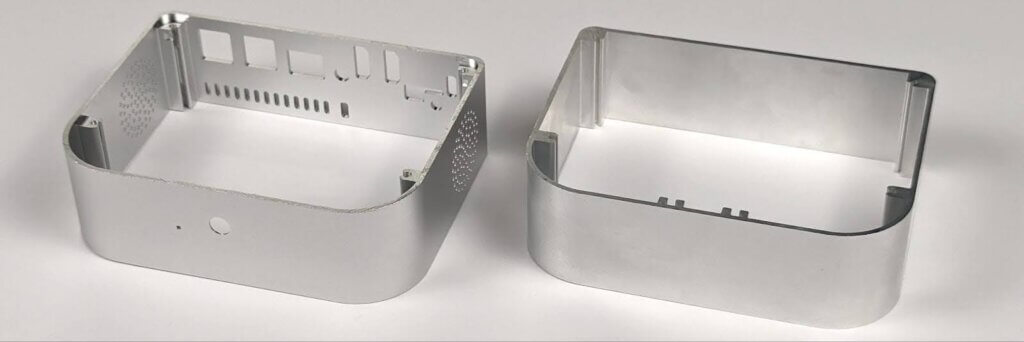
A good balance between these two options is extrusion + CNC machining. In this approach, the profile for the enclosure can be extruded first, and other features can be CNCed over the extruded profile.
Because the extruded profile is often hollow and CNC operations are superficial, the CNC time would be minimal (a few minutes). This keeps machining time and cost low.
Another benefit of aluminum extrusion is that you can extrude long tubes once and keep the material in stock to be CNC machined later. This way, you only need to commit to your extrusion profile and can change CNC cut patterns as your design evolves.
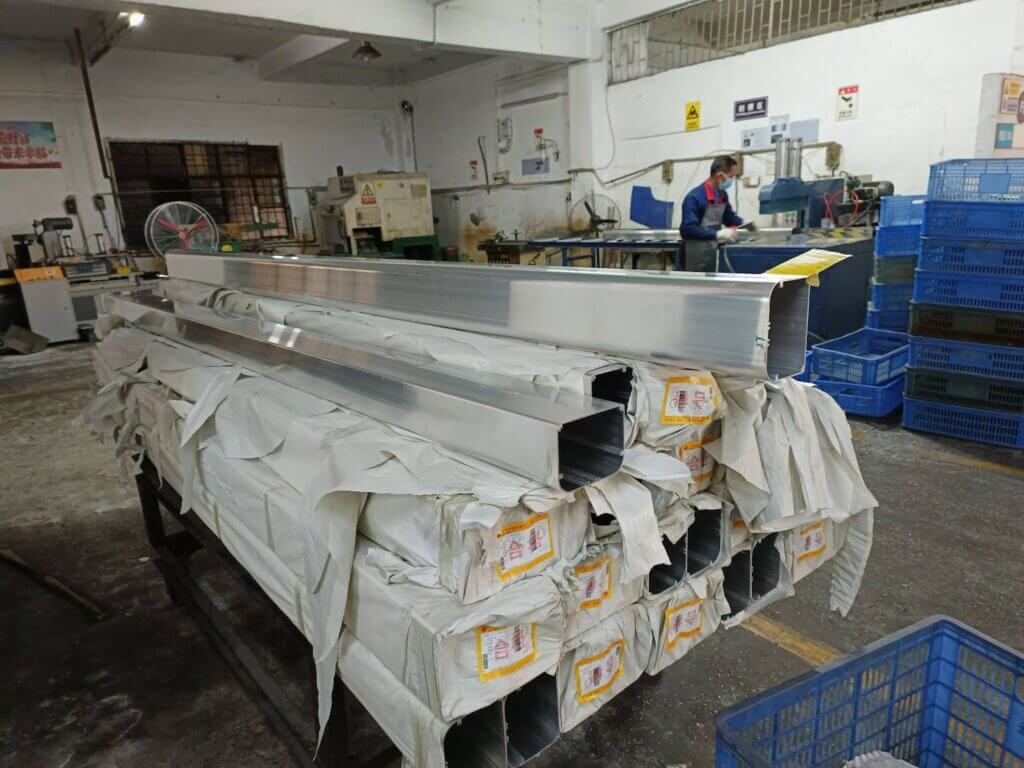
Long extruded profiles before length cutting
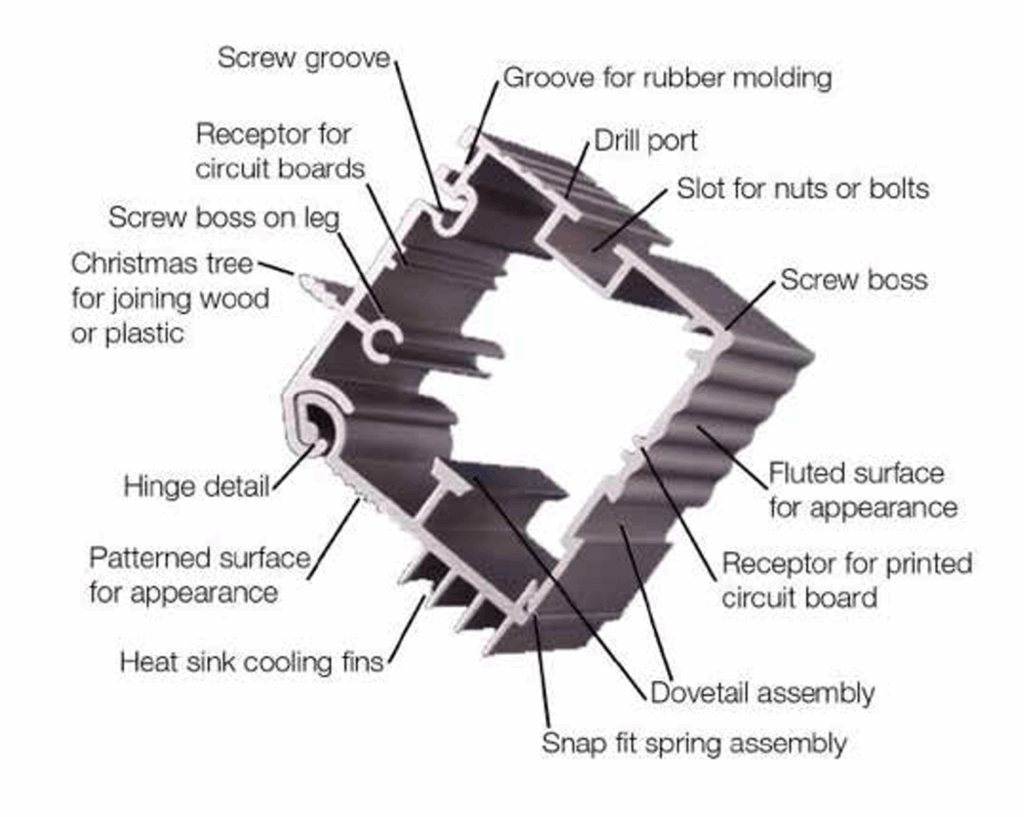
Extrusion profiles can be designed to allow for various features including grooves, hinges, snap fit spring, locking joints, etc. The image below shows some of these features:
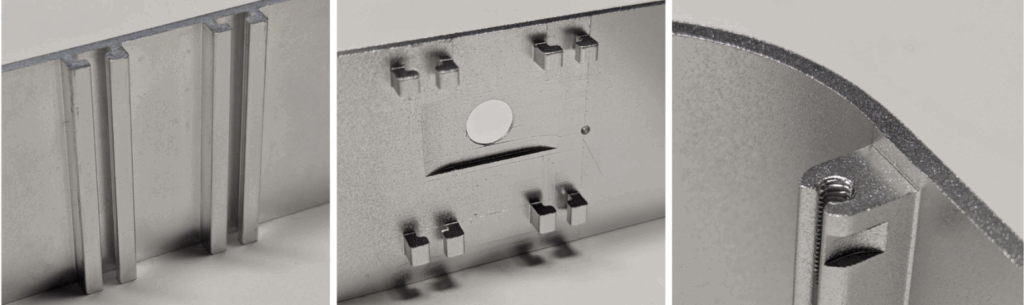
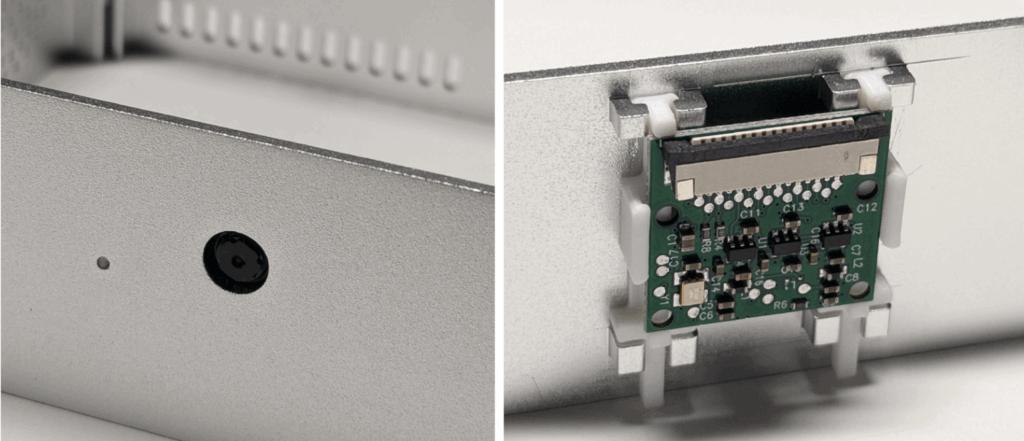
In designing the Ubo Pod enclosure, I used some of these features, notably receptor rails for the front camera, screw groove, and grooves for snap-fit features:
Another advantage of working with aluminum is the ability to apply different surface finishes, including sandblasting, anodizing, painting, etc.
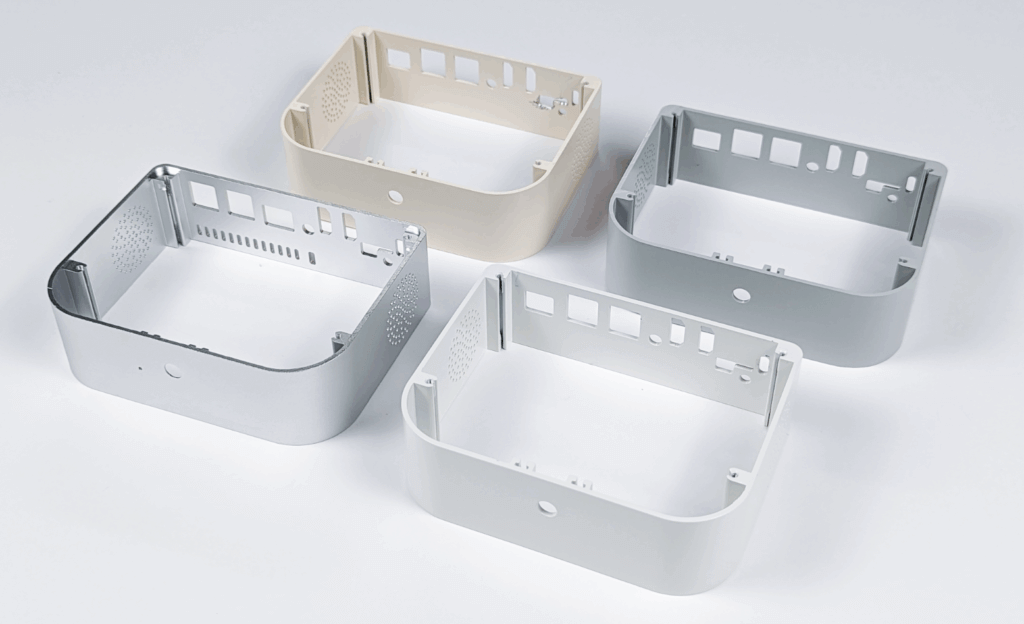
The image below shows different colors and finishes of Ubo enclosures with different CNC-machining patterns, all executed on the same extruded profile:
Hybrid 3D-printed designs
3D printing is often viewed as a tool for prototyping and typically not used in mass production due to several limitations: (1) poor surface finish, (2) poor mechanical strength and durability, and (3) long time to produce and high per-unit cost.
However, there are scenarios that 3D printing can be beneficial in mass production while not subject to the above limitations.
This is often the case when the component meets one or many of the following conditions:
- Very small so that hundreds of them can be printed on a single build plate
- An internal component
- Not subject to constant mechanism stress or strain
- Can have multiple variants
If these conditions are met, you can consider 3D-printing the component for the first 100–1000s pieces.
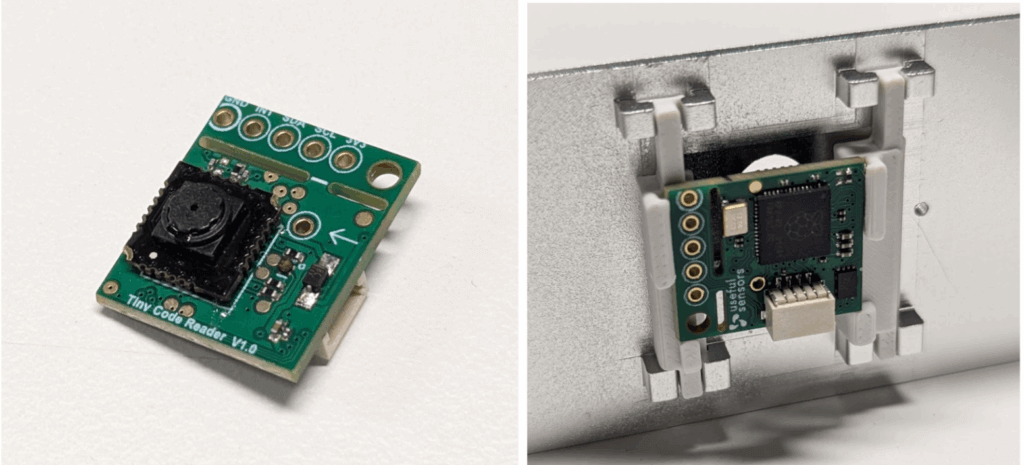
I utilized this idea to build a 3D printable camera rail that can be easily customized and redesigned to accommodate various types of camera sensors. Hundreds of these small rails can be 3D printed at once in a few hours.
Since this is an internal component and invisible when the product is fully assembled, the surface finish doesn’t matter as much.
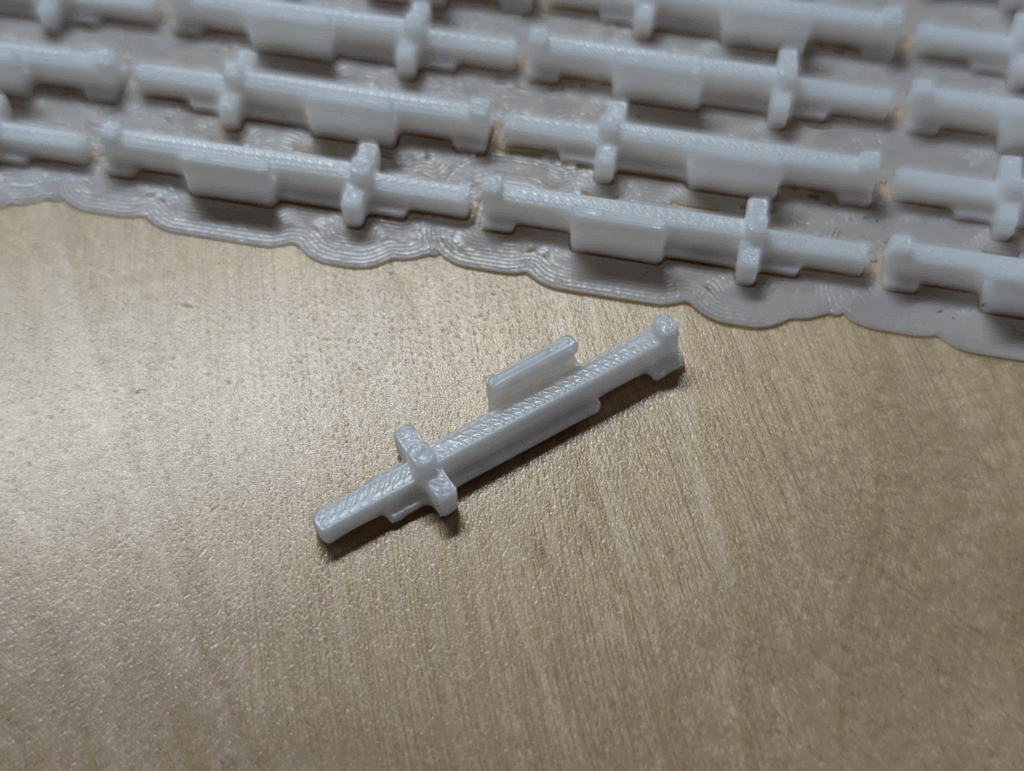
The image below shows how the 3D-printed camera-holder rail holds the front camera module:
The picture below shows a modified 3D-printed rail design that holds a different camera sensor:
Wood with 3D printing
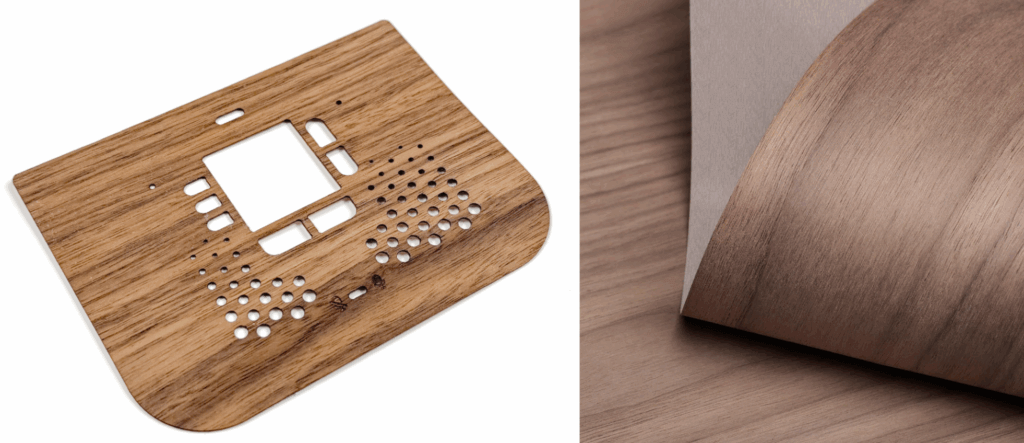
One of the issues with 3D printed parts, especially with FDM printers, is the coarse and layered surface finish — which can give out a prototype and unfinished vibe.
One technique I used to address this was to cover the 3D printed top surface with laser-cut real wood veneer. This gives the product a warm and differentiating look. This approach is however not scalable for volumes over 1000pcs and I’m looking into other alternatives such as hot-press faux leathers for larger production volumes.
Part 2
There are several other techniques that I share in the second part of this post. These include compression molding, rapid PCB prototyping, incremental injection molding, and more.
informal is a freelance collective for the most talented independent professionals in hardware and hardtech. Whether you’re looking for a single contractor, a full-time employee, or an entire team of professionals to work on everything from product development to go-to-market, informal has the perfect collection of people for the job.