Spooky tales of scope creep

In honor of spooky season, let’s talk about one of the scariest concepts of all in the world of hardware development: scope creep! Put simply, scope creep happens when the requirements of a project exceed what was initially agreed upon. It can be something small like adding a status LED to your circuit board or adding a footer to a website, or it can be a massive change like choosing a new manufacturing method or microcontroller to use at the last minute. If left unchecked, scope creep can cause team member burnout, increase the cost to develop and manufacture your product, and blow up project timelines.
When is scope creep OK?
First off, a little scope creep is nothing to be ashamed of — it’s perfectly natural! As projects evolve and mature, things change from our initial expectations. Small shifts in the product requirements document may happen during prototyping, user testing, and evaluation. Open and clear communication between departments early and often can help reduce the chances of this happening as much, but I rarely work on a project that hasn’t changed a little from inception.
A key way to reduce scope creep is to create and maintain documentation. Phase 0 of any project should be defining the product requirements document (PRD) — a list of product features and requirements that team members can refer to as the guiding light for what the end product should be. Changes to this document should be tracked in a manner that shows not only the change, but the reason behind it. You don’t need a novel — just something as easy as “changed from white lights to RGB lights to allow more status codes to be displayed to the user” helps massively. Hardware development can be frantic and things can fall through the cracks. It can be hard to remember the rationale behind a change, so write things down, please.
9 common gotchas
While some changes may have minimal impacts to the timeline, budget, and amount of work required, others may feel like blindly lobbing a hand grenade into the office. In my experience, these hand grenade-y changes aren’t intentional but come from a place of ignorance. If you’re new to hardware, it may seem simple to “add waterproofing later.” Ask any mechanical engineer to do this, however, and you may want to run away quickly. I love to ask leading questions during the PRD-creation phase to try and identify future landmines that may become scope creep killers.
Here are a few gotchas I’ve dealt with firsthand while developing products, and how to hedge against them.
1. Make it waterproof
I see this one more often than most, and it’s one of my go-to questions when scoping a project. Making something waterproof is hard, and making something waterproof last minute is nearly impossible. There are a variety of IP (ingress protection) ratings you can target, and I recommend targeting one number higher than you may advertise to customers.
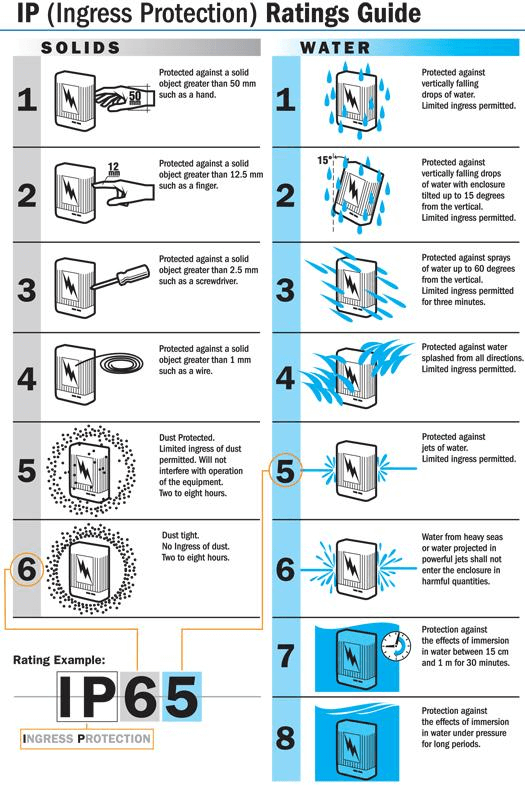
I have this chart printed out and on my desk at all times. Source: nemaenclosures.com
The IP rating system has two digits: The first dictates how “solids-proof” the enclosure is, while the second digit dictates how waterproof it is. A solids rating of 1–5 is very easy to hit, while a rating of 6 requires a bit of extra design consideration. A water rating of 1–3 is similarly pretty easy, but anything higher requires more and more consideration. IP67+ products can be a nightmare to design from scratch, and impossible to add on as a requirement to a mature hardware design.
2. Add bluetooth or wireless connectivity
Typically, this shows up when a companion app is added to the project scope late in the game. Adding a wireless radio last minute is a headache for electrical engineers, mechanical engineers, and firmware developers. Careful consideration must be made to position an antenna to work effectively within an enclosure and to ensure it can be properly certified by the FCC for sale. Providing app connectivity requires a massive chunk of firmware work to provision, connect, and upload data. When in doubt, make it dumb. Nobody wants to use your app anyway.
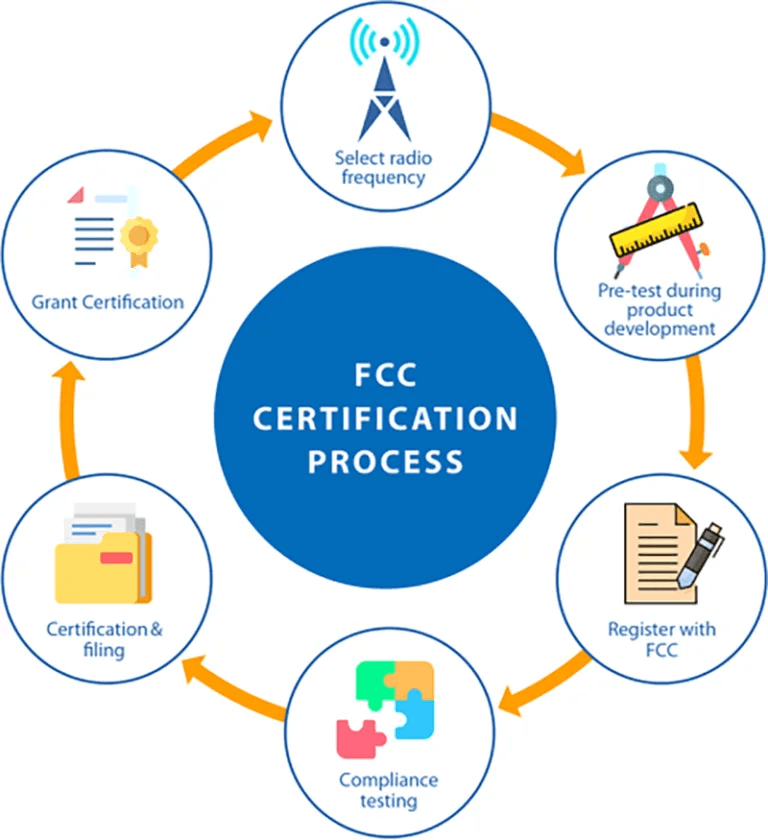
This doesn’t look like it will be fast OR cheap, right? Source: arshon.com
3. Make it injection-moldable
This is what I’m best at doing, and it’s taken me years to get good at it. Put simply, you can 3D-print nearly any shape you create, but you can only injection-mold something that has been designed for it. Designing parts for this process requires expert knowledge of the rules of injection molding — and when and how to break them.
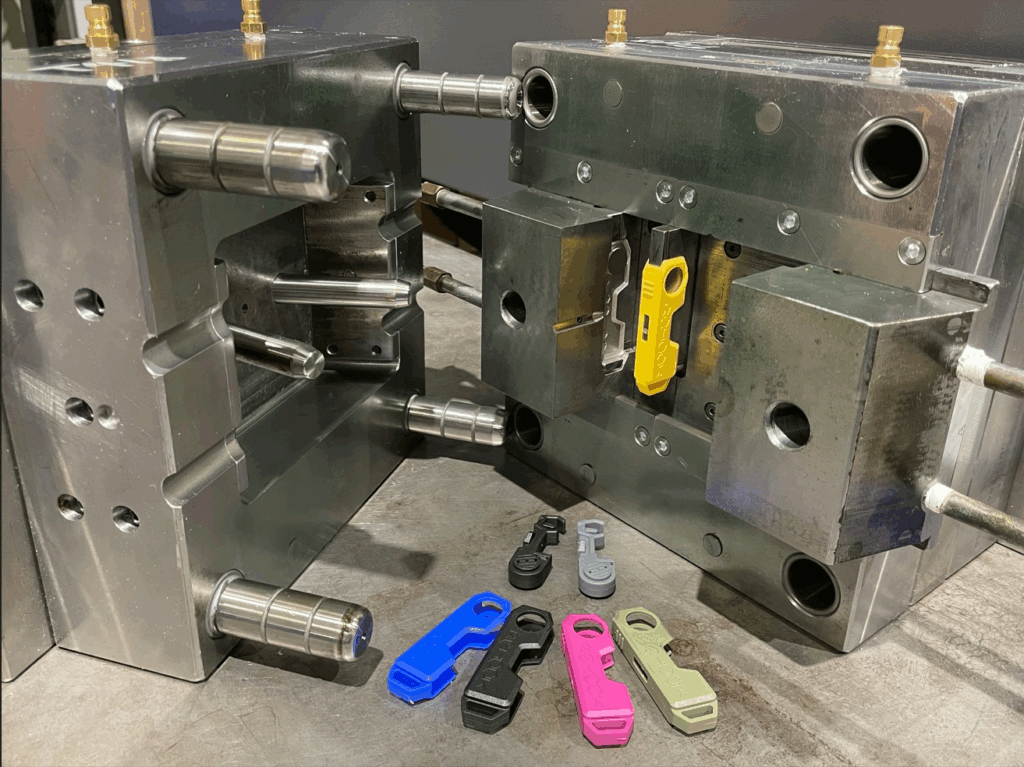
Molds are expensive and require experts to design the part and tooling. Source: Bowles & Walker
Careful consideration needs to be taken for constant thickness of the enclosure, sufficient draft angles to support texture and part removal from the mold, and knowing when and how to design overhanging features. The odds of your 3D-printed enclosure happening to also be injection-moldable are very, very low. I recommend always designing with the most limited manufacturing methods in mind from the get-go to provide the least amount of redesign last minute. I design most parts to 80% moldability early on, and save the nitty gritty work for once we’ve locked in our manufacturing methods.
4. Make it smaller
In my experience, it’s very hard to make products smaller without full team involvement. Devices like earbuds, watches, and phones are designed by super-integrated cross-functional teams. Each and every millimeter of space is taken by components and negotiated. These projects are hella fun to work on if the right team is involved. The switch in work style from a device fairly optimized for space to something tightly integrated can cause teams to explode. It may also require a ground-up redesign of how components are placed and connected. If a critical requirement is the overall product size, then ensure your team members are all working in lock-step from day one on that goal.
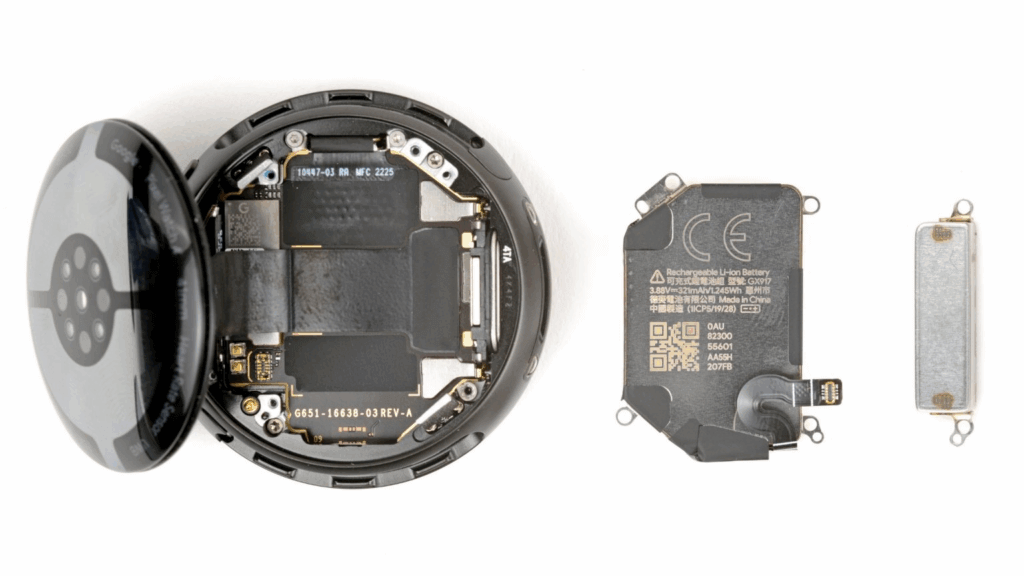
A teardown of the latest Pixel Watch 4 from iFixit — awarded a 9/10 on the repairability scale (nice!).
5. Change out the battery
For most small form-factor devices, the battery can be one of the leading drivers of overall product size. Changing the battery late in the game can snowball into major changes across multiple team members. A larger battery may impact the industrial design of the product, which means a mechanical engineer will also need to help modify the design of the enclosures. Typically, space added for a battery means space is removed for a circuit board. This means an electrical engineer also needs to redo the board layout to work around an updated board size.
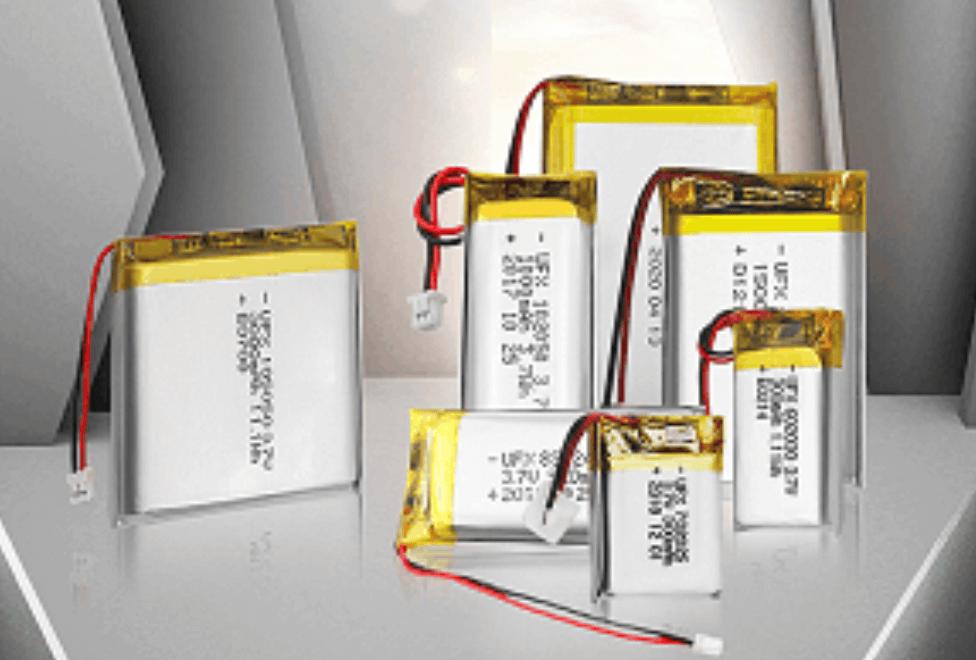
Batteries come in all shapes, sizes, and flavors! Source: benzoenergy.com
If the battery chemistry or specs change significantly, the power management circuitry may also need to be overhauled. This can ripple into firmware development changes as well. Some batteries are already certified by UL or UN, saving additional costs and time. Others are not, and this time and cost needs to be factored in. Creating a power budget and power requirement early helps to reduce the chance of needing to swap in a different battery later on.
6. Add a screen, speaker, or microphone
Adding major input/output components after the product has been designed can be a real pain. Speakers require specific acoustic chambers in order to function well. Similarly, microphones need proper positioning and gaskets. Screens need to be connected to an enclosure in a robust manner. All of these parts also require enough overhead on the microcontroller to be supported, and room for the connectors and communication lines.
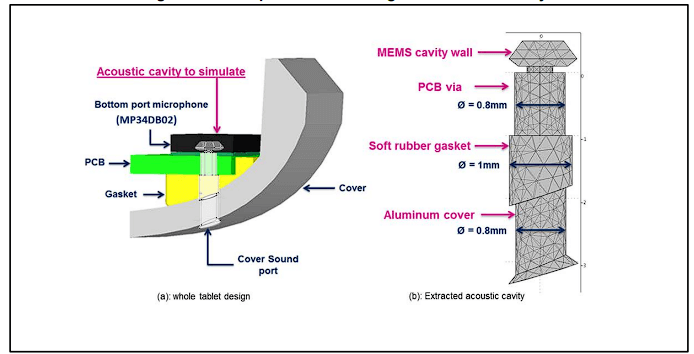
Microphone gaskets can be deceivingly difficult to design well. Source: st.com
Driving a display is far more complex than flashing some status lights. Speakers need to be amplified and typically need volume controls as well. Microphones require additional signal processing. Each of these items should be locked down early during the PRD-creation process. Adding them at a late stage may require significant redesign.
7. Anything to do with the word “modularity”
At first, making something modular sounds dope, right? You can swap in and out different bits and upgrade as you go! This makes for super exciting product categories like Framework Laptops, and I love it. However, you need to design for modularity from the get-go or else you may be in a world of hurt. There’s a spectrum of modularity and decisions on who gets to replace the components. A customer-replaceable module may need additional space for enclosures, changing to a higher cycle-count connector, and careful consideration on future modules and communication protocols to support it. A factory replaceable or upgradable module is easier to implement because you have more control over when and how frequently it’s replaced and by whom.
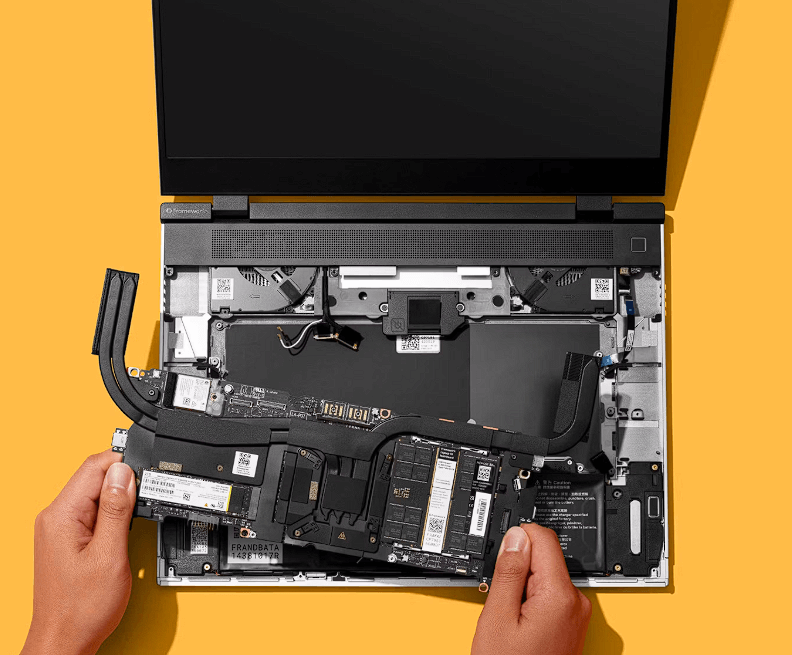
Mad props to Framework for making a consume- friendly upgradable laptop. Source: Framework
8. Change to a new microcontroller
If you want to really freak out a firmware developer or electrical engineer, recommend changing out the microcontroller late in the development process. Certain microcontrollers may be pin-compatible, meaning that you can swap them in with relative ease. Most will need at least some work on remapping pins and some firmware development to get it working right again. Switching between major platforms can become a bigger nightmare.
I’m a huge fan of using a castellated SoC (system on chip) for most designs, as they give you a great mix of options to select from and are typically FCC certified. They’re soldered directly onto your circuit board and have all of the nitty-gritty circuitry already laid out for you. They’re more restricting on where you can place them and they take up a bit more space than laying out all of the circuitry yourself, but they’re far more flexible and faster to design around. I recommend working with your electrical engineer and firmware developer to select the proper SoC for your applications needs, and discuss any future changes that may be in the pipeline and might influence their decisions. It’s probably better to select an overpowered and more expensive SoC for your first product than to try and add more juice last minute.
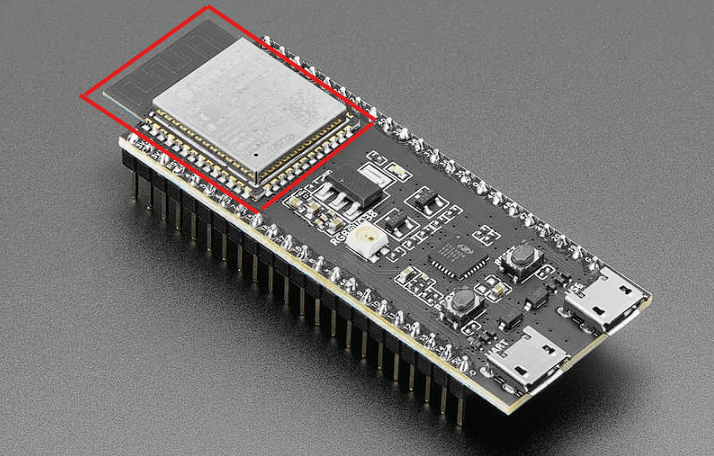
This ESP32-S3 module has castellated edges, which make it easy to solder onto a circuit board. Source: Adafruit
9. Change where the LEDs are
Lights are a super common way to communicate with customers. Green light = great; red light = panic. Getting light from a circuit board to the correct position on your enclosure can be a real challenge, however! A diffused and beautiful light indicator requires the careful design of a light pipe from a mechanical engineer or optical engineer. Light pipes are translucent plastic shapes that channel, reflect, and spread light to the ideal location.
A well-designed light pipe needs to account for manufacturing methods, total internal reflection, and material properties like the indices of refraction. In other words, a good light pipe design takes time and effort. Moving the location of these lights on an enclosure will, at the very least, require updated designs and calculations for your light pipe. It may also require moving the LED placements on your circuit board. Now you’ve irritated at least two engineers.
One of the more complex light pipe designs I’ve worked on.
If you’re less sensitive to how perfectly diffused the light is on your enclosure, moving lights around can be easier, but you’ll still hear some grumbles. The final position of these components should be agreed upon by engineering, design, and marketing as early as possible to avoid redoing work. Use physical mockups and renders to ensure all teams are happy with placement before investing additional engineering time making it real.
What should I do then, grumpy Gus?
I represent hundreds of thousands of engineers who have had the goalposts moved on them midway through a project. My goal here is to make everybody’s lives a bit easier by ensuring the right questions are asked early on to reduce scope creep as much as possible.
Here are a few good questions to ask when scoping a project:
- Does it need to be waterproof? What IP rating are you targeting?
- Do you anticipate adding a companion app or networking features later? Is this a “smart” or “dumb” device? What wireless networks are needed?
- Are the battery or other internal components customer-replaceable?
- How do users interact with the device?
- How do you recharge the device?
- How do you update the device?
- Should this device survive large impacts or drops if mishandled?
- Are there any medical, food safety, high power, or other certifications the device must adhere to?
- How many devices do you anticipate making in the first year? In future years?
How to hedge against scope creep
At informal, we’re huge fans of scoping projects in small phases and billing by the hour instead of a fixed rate. This allows us to provide accurate and competitive pricing based on the current state of a project. For us, changes in scope can impact the amount of time it’ll take to complete a project — and ultimately the costs incurred to the client. We always recommend proactively identifying scope creep and having a discussion as soon as possible about the impacts to timeline and costs.
Working in smaller phases gives us a stopping point where we can pick our heads up, reanalyze the project, and provide a new estimate for the remaining work. For example, we commonly quote Phase 0 as creating our PRD. At the completion of Phase 0, we can quote for creating system architecture and a working prototype. Trying to quote this earlier would be futile because we’re still unsure what exactly we’re making.
Our systems also allow for project extensions to be filed by our team at any point. If they sense that a project scope is changing, we recommend having a conversation about the impact as soon as possible. We can then request additional hours on a project to help accomplish the newly requested components. It allows flexibility within limits.
As always, I’m here to chat through your project and ask the probing questions to help reduce scope creep later.
✌️ Sam
informal is a freelance collective for the most talented independent professionals in hardware and hardtech. Whether you’re looking for a single contractor, a full-time employee, or an entire team of professionals to work on everything from product development to go-to-market, informal has the perfect collection of people for the job.