The art of a looks-like prototype
One of the hardest parts of hardware design is convincing folks to give you money to fund your vision. There are many ways to go about doing this, from a friends-and-family fundraising round to pitching VCs or running a crowdfunding campaign. At some point, you’ll probably want to show off what the final version of your thing may look like. Sure, you can do a fancy render or animation, and it may convince some folks, but nothing beats a real physical prototype for selling the idea. That’s where looks-like prototypes come in handy!
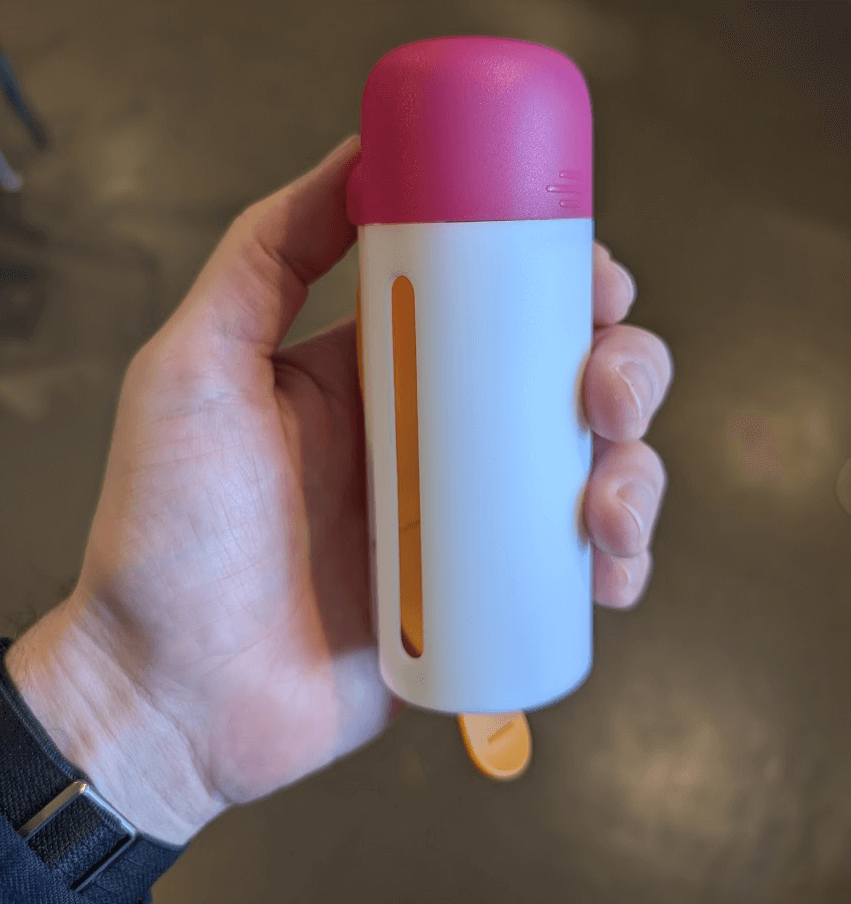
A “looks-like” prototype looks like the final product we’re aiming to create (duh!). It has the proper colors, textures, labels and other details required to represent the final manufactured goods. These models are especially great for photos and videos for presale of your products. I like to think of them as movie props more than functional final units. Getting a looks-like prototype as soon as you’ve locked down the product’s industrial design is a great way to enable your marketing team to start creating the assets you need for a successful product launch.
What do I need to get a quote for this kind of prototype?
First off, you need a final or near-final industrial design model. I highly recommend ensuring your engineering team has approved the design before investing money in prototypes. After you show your product to the world, it becomes much harder to change the way it looks later on. Lots of questions can arise from potential customers that may eat up valuable marketing and PR time.
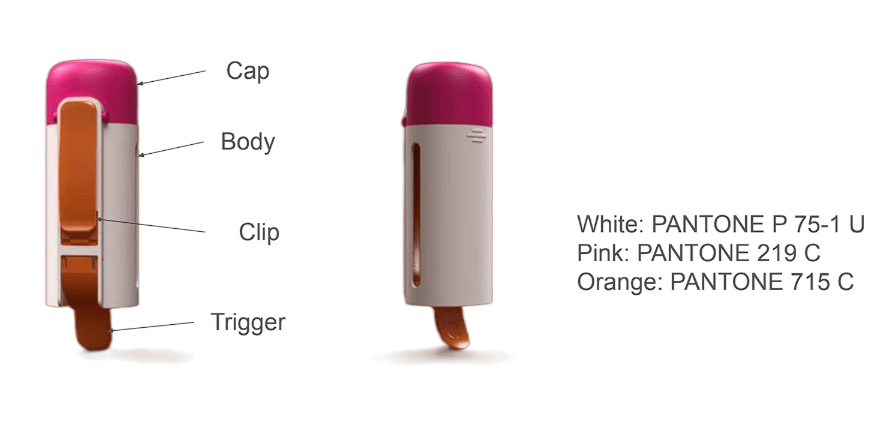
Once the industrial design is locked in and approved, you’ll want to create a color, material, and finish (CMF) document. This document captures the color, material, and finish (duh) of each part. As a side tangent, “matte black plastic” is not a CMF spec. You want to call out specific textures, colors, and materials to ensure you’re getting exactly what you want. This can be hard to dial in, so I recommend learning more about the complexities of CMF and browsing our CMF database.
Let’s use my Donut Hole-der as an example here because why not? Here’s an example of the overall product CMF and the CMF of an individual part.
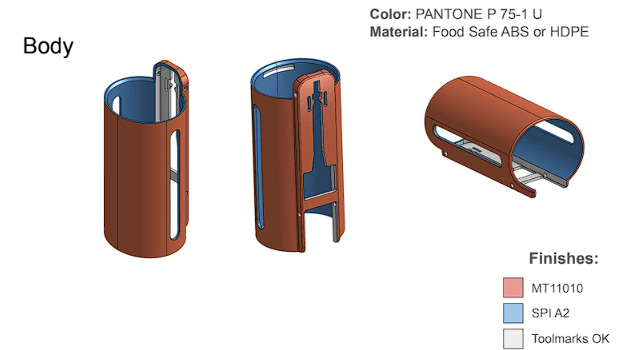
Notice how I use colored faces in CAD to call out where various finishes and textures should be on the part. MT11010 is a light matte texture, and SPI A2 is a highly polished glossy surface. You can mix and match to your heart’s content, and there are some really wacky options available.
Choose the number of prototypes to make and select the manufacturing method that is best for your product. There are two main methods of making high-end cosmetic prototypes. One is to fabricate each sample separately using 3D printing or CNC machining, then finishing them to match the desired CMF. The other is to use a method called urethane casting to mold limited production batches of parts.
For the Donut Hole-der, we worked with the team at Fresco Design to order both methods and compare. Gustavo and his team are experts at creating beautiful cosmetic models, and their process is amazingly dialed in. They also did a phenomenal job documenting the process, so we can share a peek behind the scenes too! Let’s dive in.
Hand-painted SLA process
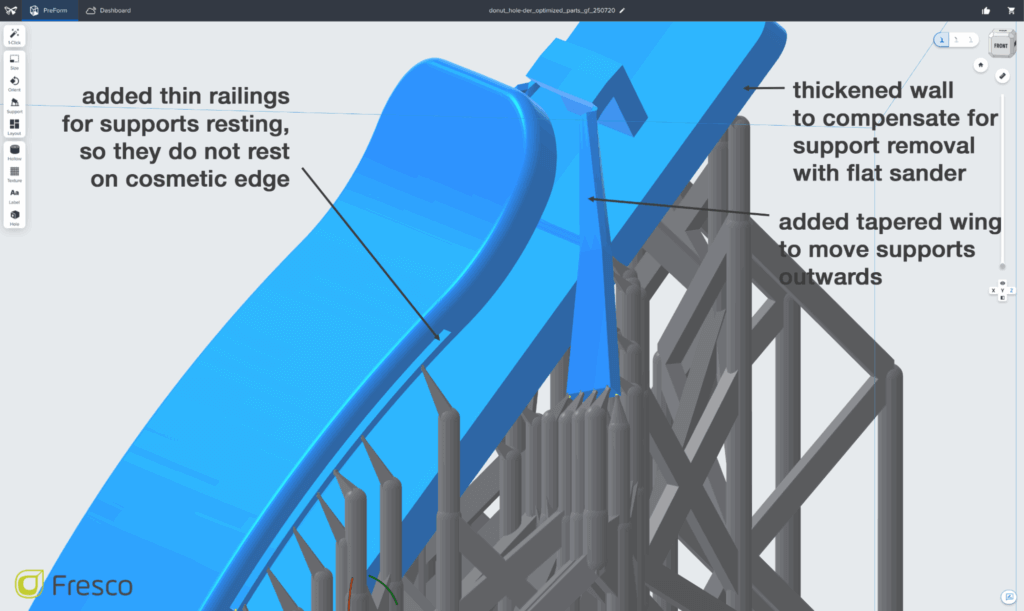
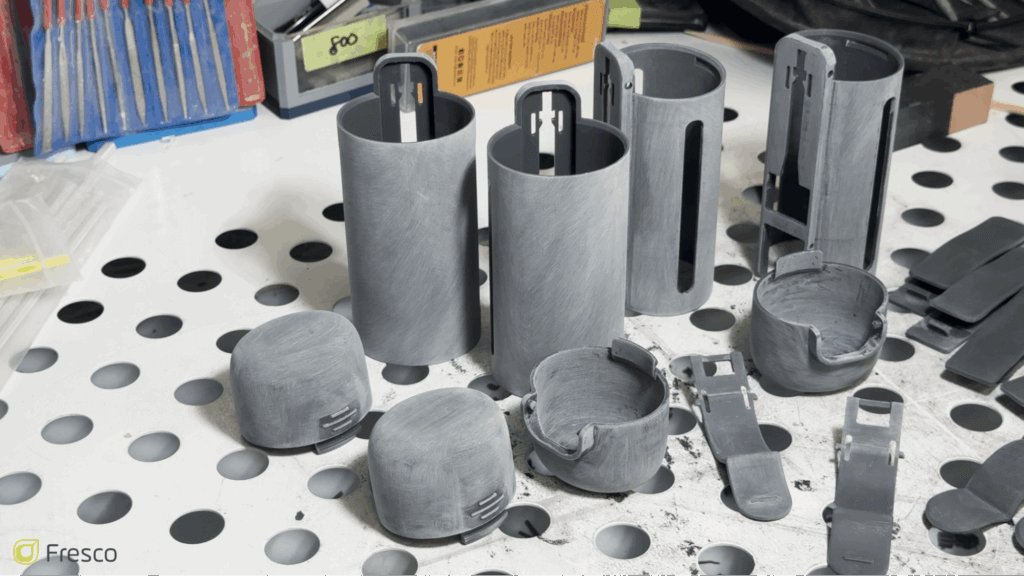
Gustavo from Fresco Design explained that his process starts by 3D-printing each part on a Formlabs 4 SLA 3D printer. SLA prints are known for their incredibly high resolution, and recent materials have allowed strong and functional parts to be made using this technology. He meticulously orients each part to ensure the supporting material added won’t cause any imperfections on the final unit. To do this, he may add additional structures to the 3D model, including adding protrusions to the parts that get cut away or sanded later.
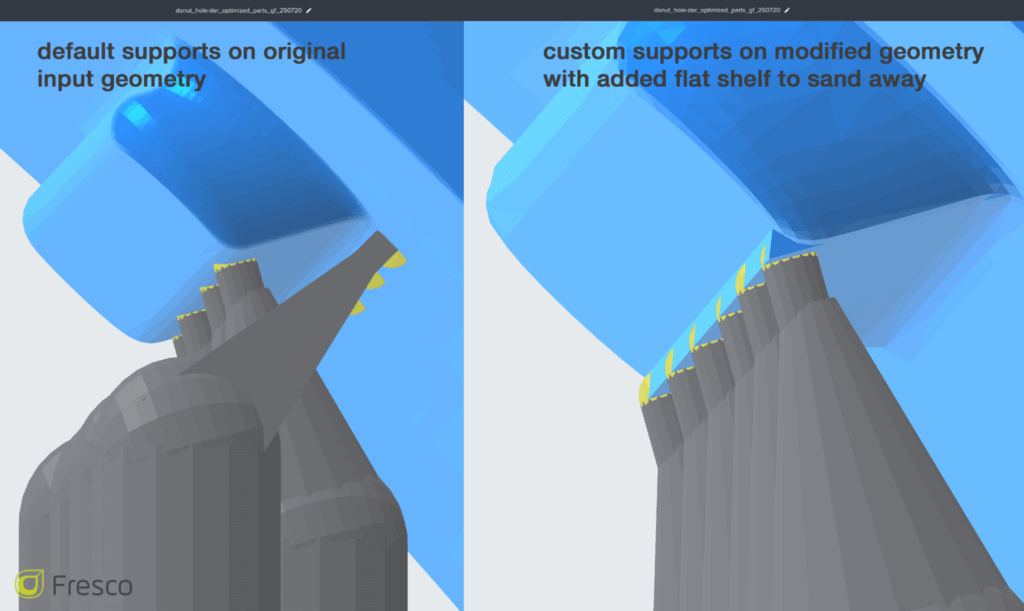
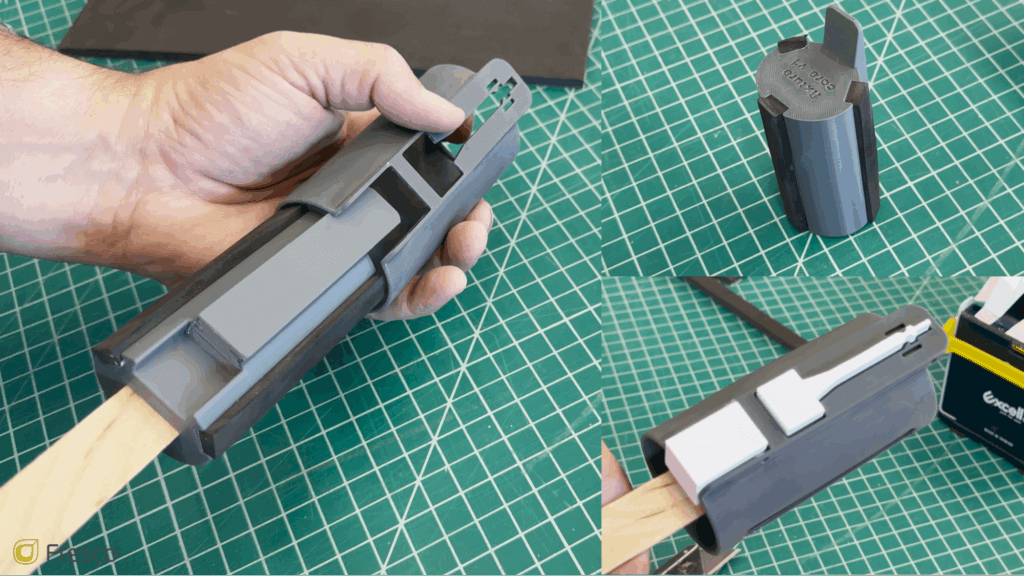
While these high-resolution models are being printed, he also creates custom sanding fixtures to remove the surface imperfections caused from the SLA printer support material. These are also 3D-printed and labeled. For every cosmetic part printed in resin, there are usually one to four FDM fixtures modeled and printed to perfect the finishing process.
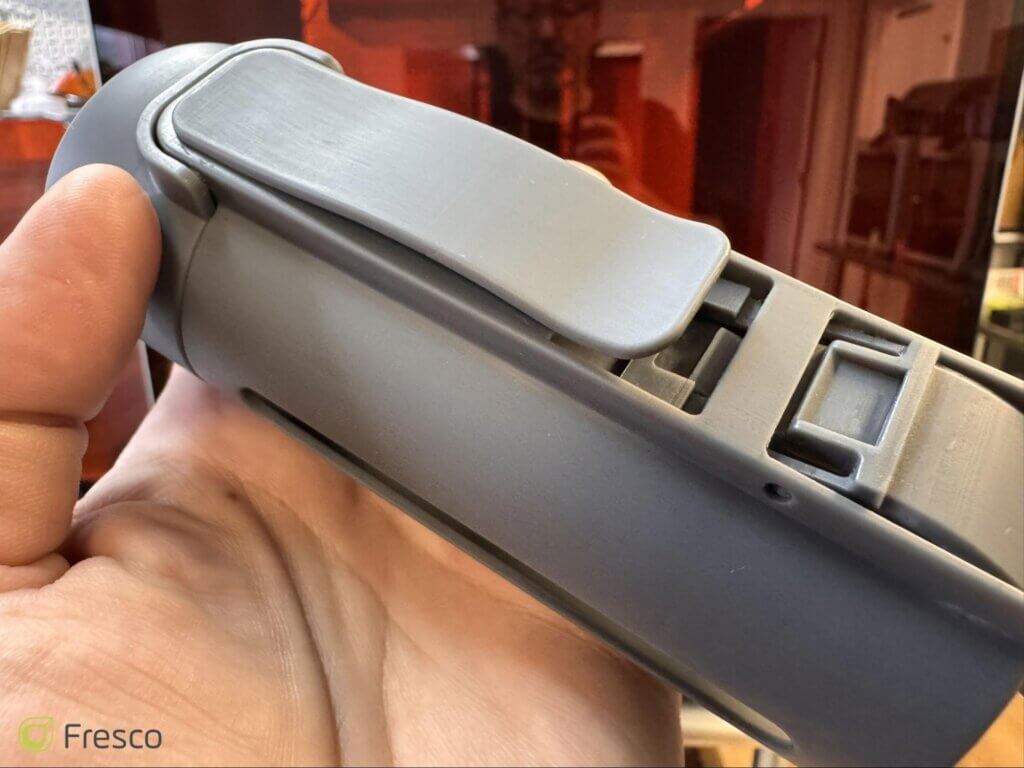
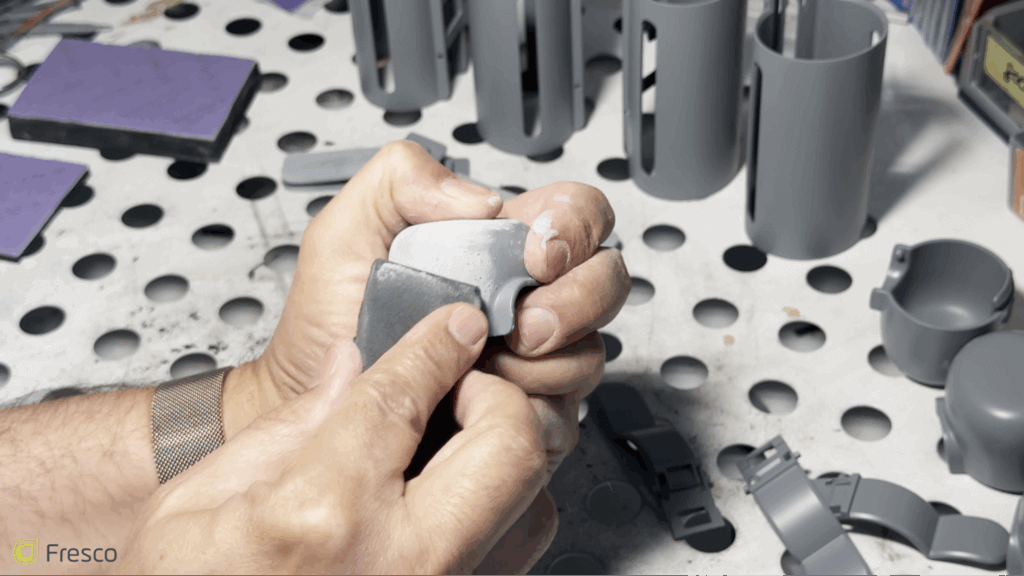
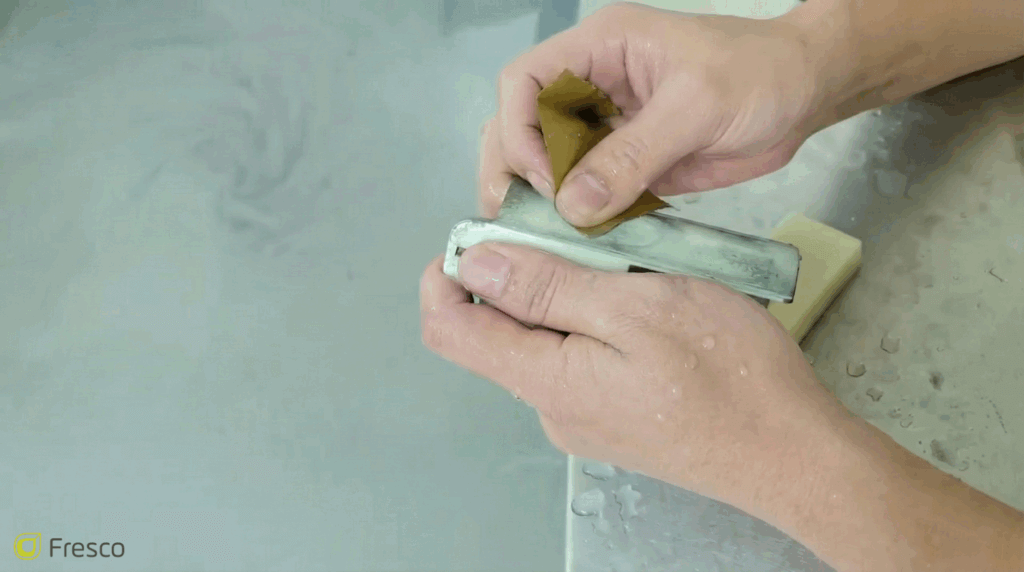
After all the parts are printed, his team carefully removes the support material artifacts and sands until the surface looks smooth, primarily but with a sanded texture to improve adhesion of the next step: urethane filling primer. At this step, they remove imperfections while also maintaining design intent detailing, curvature, and hard edges.
They go from this:
To this:
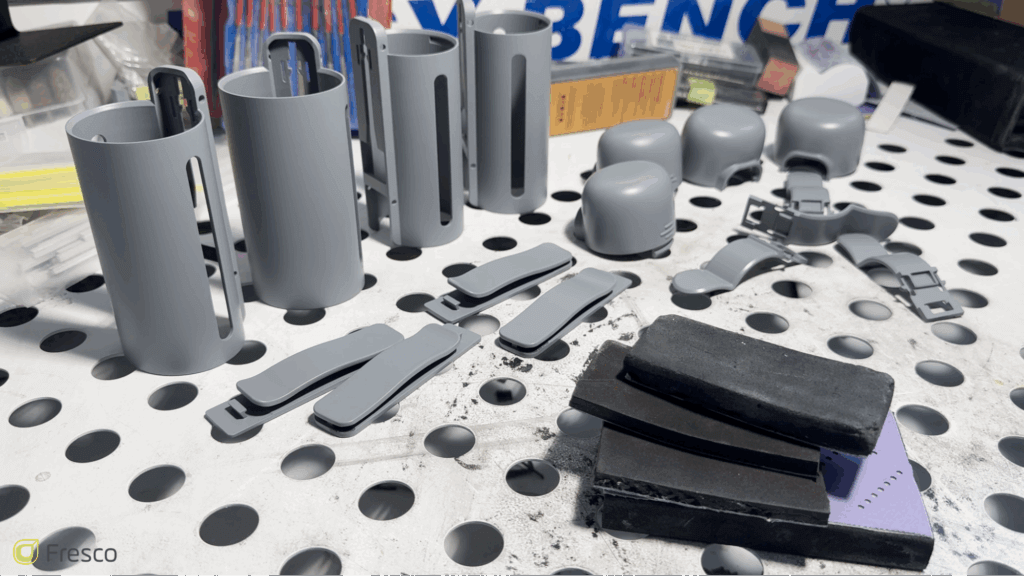
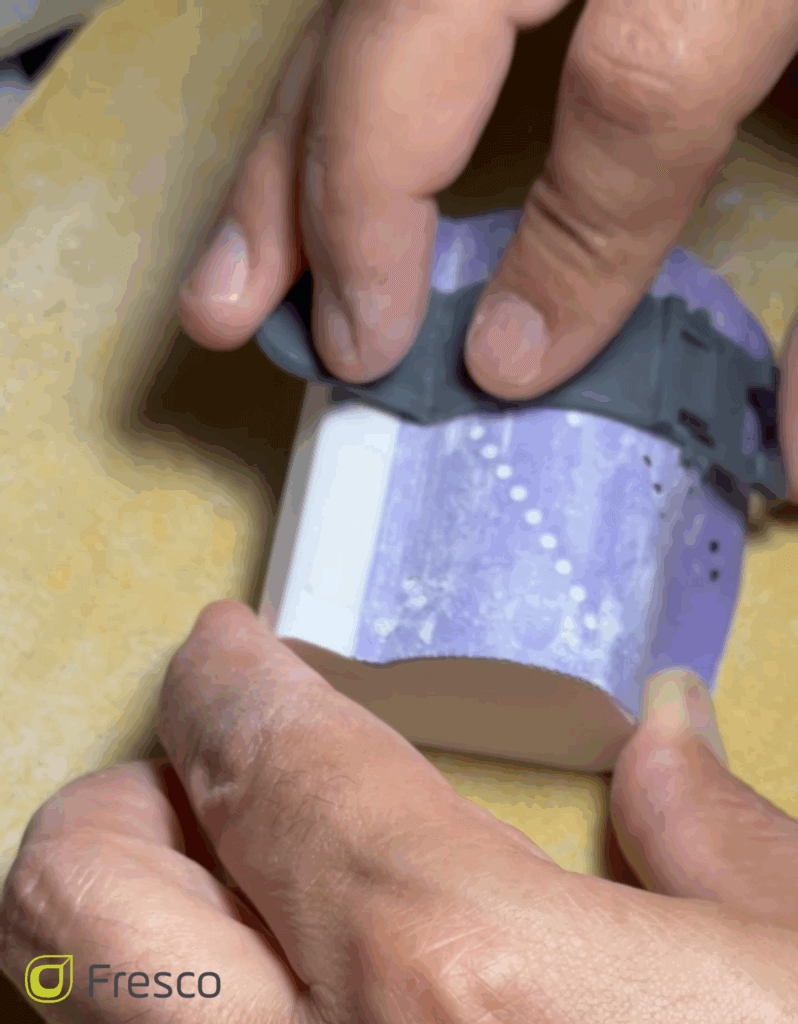
This beautifully smooth primer finish is also partially sanded away to create a much finer texture to grab the base color paint that comes next:
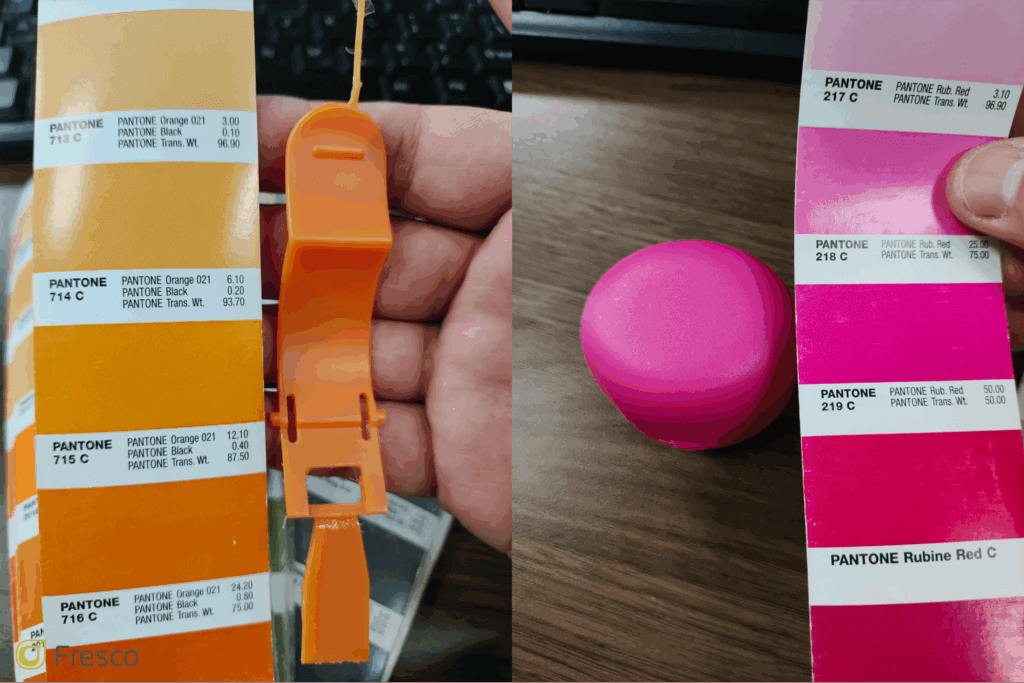
Next, we move to the spray booth. The team carefully mixes paint to match the target Pantone color. They order samples from Pantone and spray their mixed paint directly onto the swatch until it perfectly matches. Then, they carefully paint each part the correct colors. The 3D-printed fixtures help hold the parts up during painting and ensure any areas that shouldn’t get painted, like hinge pins or holes, stay bare.
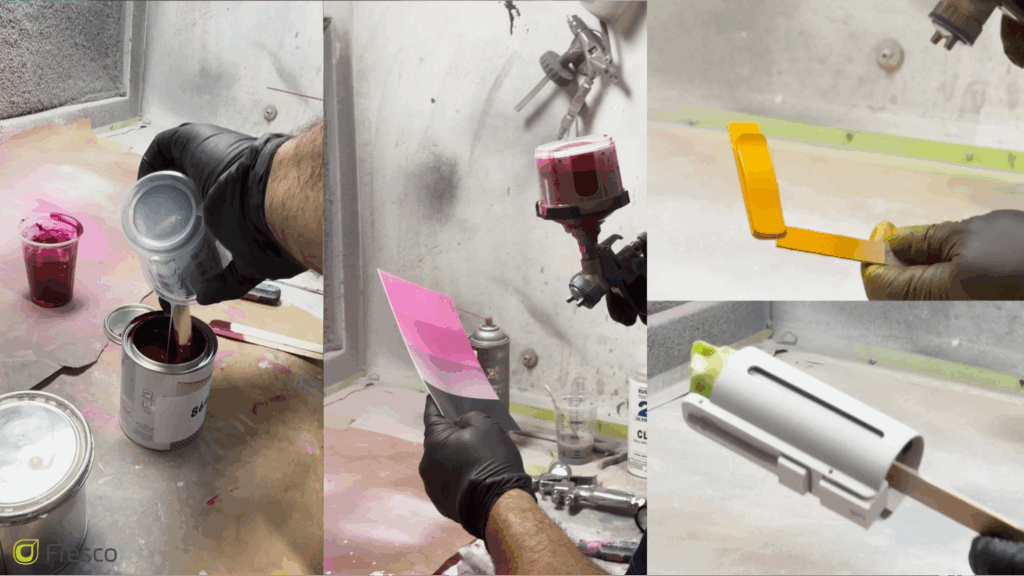
The painted parts are left to dry, then a textured clear coat is applied on top. This helps to match the desired surface finish and protect the parts from wear and tear.
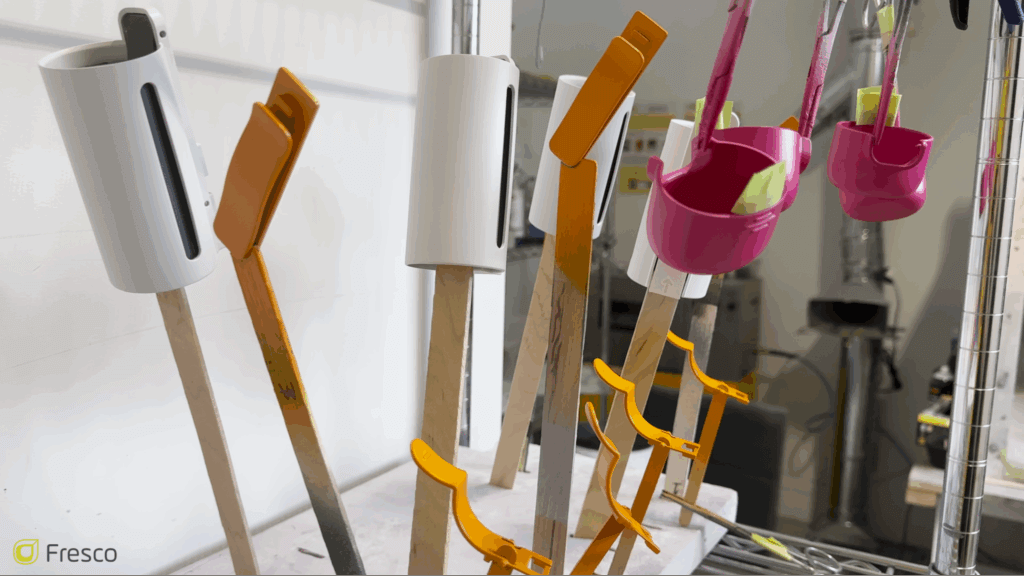
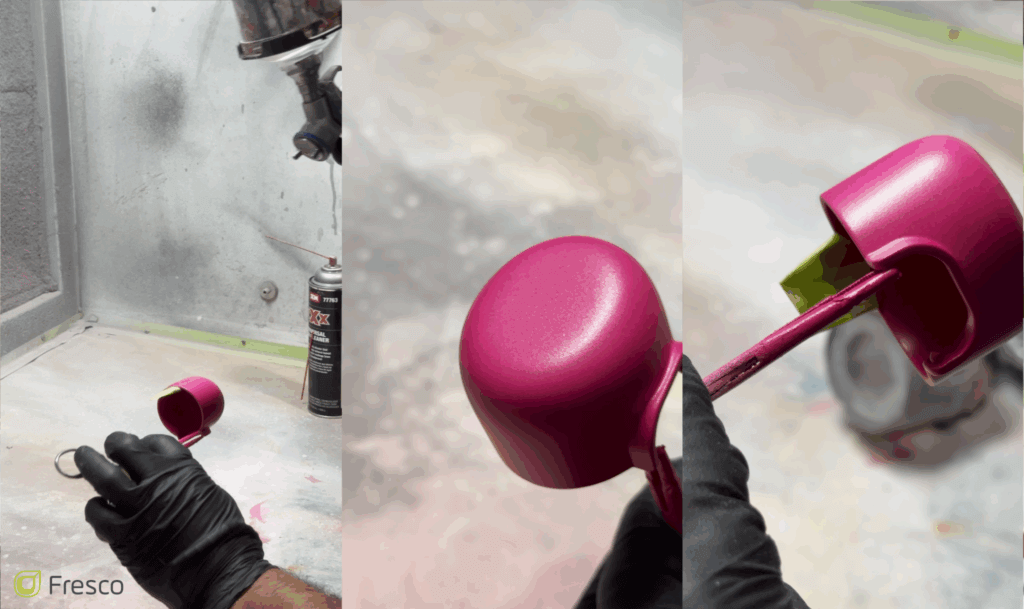
The final parts are then assembled and ready for their closeup!
![]()
As you can see, hand-painted prototypes can take a decent amount of time to refine. Getting one or two is fairly easy, but the manual processes may become costly for more than that. In addition, SLA prints are still more brittle than other manufacturing methods and may break over time or if they’re exposed to UV light for too long. Lastly, 3D-printed rubber parts typically feel more like American cheese than rubber. If any of these sound like dealbreakers, I have another method for you!
Urethane casting process
Urethane casting is one of the coolest and best kept secrets of the hardware world. What if I told you I could make you 25 prototypes that are durable, look as good (if not better) than injection-molded plastic, and perfectly match your color and finish requirements? The only downside is that the per-unit costs are a bit higher than you may want. I recommend urethane casting whenever you need between 5 and 25 prototypes, and usually push for ordering less than 15 to keep costs down. We’ll dive into that reasoning in a moment, but let’s learn about casting first.
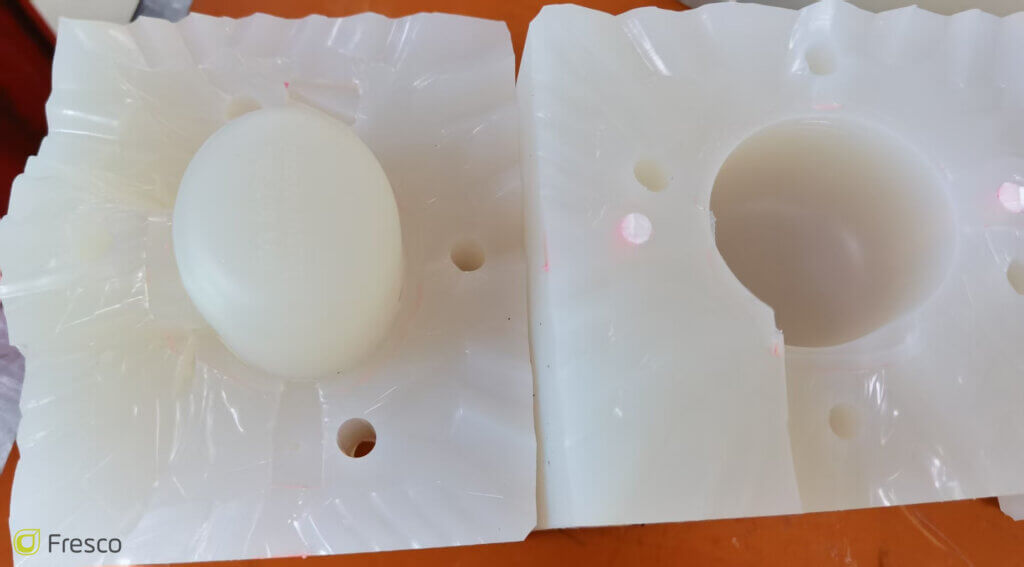
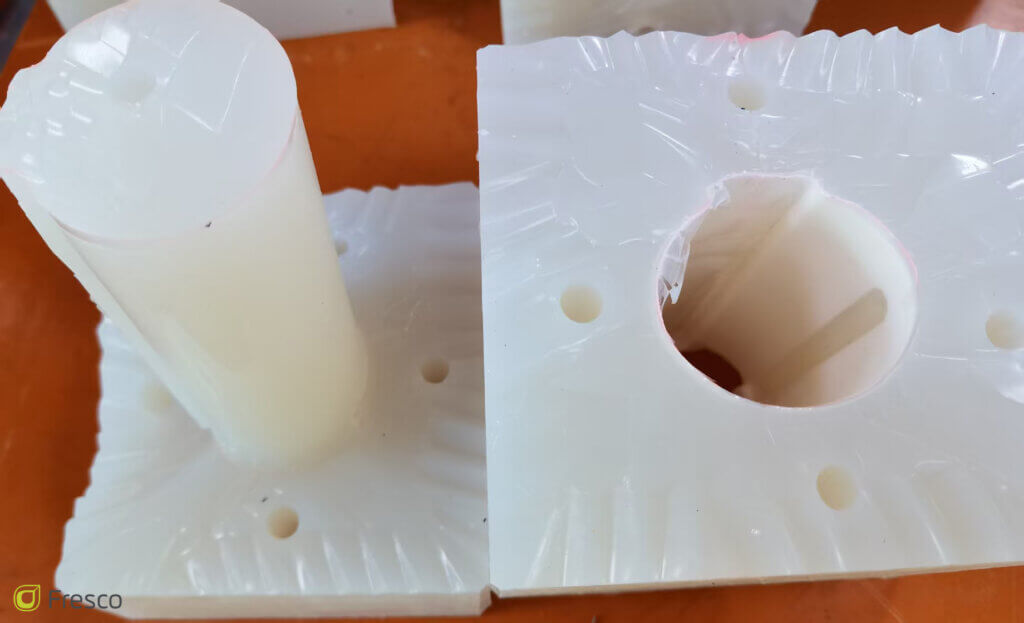
Urethane casting works by creating a perfect replica of the part to be cast. Typically, an SLA 3D print or CNC-machined plastic golden sample is created. This sample has special texture paint applied to it to replicate the desired surface finish of the final part. This piece is then encased in silicone rubber all around it, with strategic support structures added during the process to keep it in position.
The details of this process are rarely documented, and the world’s experts prefer to guard their trade secrets. The main differences of creating a master part for urethane casting replicas from the SLA finishing process is that the master needs to be scaled to compensate for shrinkage, and that all the texture finishes need to be present in the master part, so the mold can replicate it — including wet sanding to achieve very smooth surfacing. Because in this case there won’t be any paint to cover or smooth it, the parts get cast with tinted resin to match the final color, just like in colored plastic resin for injection-molded parts.
After the silicone rubber cures, it’s carefully cut in half, and the golden sample is extracted. You’re now left with two halves of a mold that has the exact same shape and texture as your sample. Neat!
From here, urethane resin is mixed together with dye to match the desired colors and durometer (hardness). Urethane parts can be hard like Lego bricks or soft like shoe soles, and can be opaque or nearly perfectly transparent. This resin is poured into the mold until it fills every nook and cranny. The mold is then kept under pressure and high temperature until the material solidifies. The mold is opened and the new part is carefully extracted. This process repeats for each part.
These molds are fragile, and tend to get damaged after 15 or so cycles. At this point, you need to pay for another mold to be created. This is why I typically recommend ordering 15 or less parts! Urethane-cast parts are a phenomenal way to get beta units in customers hands without spending tens of thousands of dollars on final injection-molded parts.
For this project we also worked with Fresco’s China team, so they handled all the communication and the on-site quality inspection for parts accuracy of colors, finish, and dimensions.

How do I choose the right process?
If you want three or less units and are in a time crunch, consider working with a model shop to get hand-painted prototypes made. Keep in mind that they are typically a bit more fragile due to the painting process and if they’re SLA printed.
If you want between 3 and 15 parts or need excellent rubber materials, I recommend urethane casting. You can order as many as you like, but the costs can become pretty substantial quickly. At some point, soft-tooling injection molding may actually be cheaper. It all depends on the size and shapes of your parts.
As always, don’t hesitate to reach out if we can help you along the way!
informal is a freelance collective for the most talented independent professionals in hardware and hardtech. Whether you’re looking for a single contractor, a full-time employee, or an entire team of professionals to work on everything from product development to go-to-market, informal has the perfect collection of people for the job.