Prototype to production: Electronics
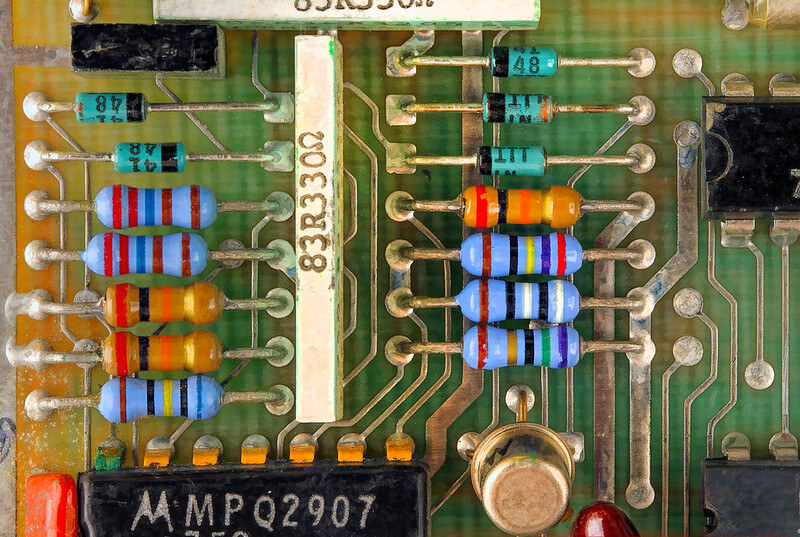
Circuit photo by arbyreed
A while back, I wrote about the hardware journey from prototype through production when selecting manufacturing methods. Today, let’s dive into the other side of things — looking at a typical process when creating the electronics for a product as well.
Most gadgets and gizmos we buy these days feature custom circuit boards stuffed inside custom enclosures. Each product is designed from scratch based on specific requirements, features, and user experiences. Getting to this final version typically can take over a year of development and iteration before you’re ready to manufacture, and there are some major milestones and step changes in complexity that occur.
Product development process
A classic product development process looks something like this:
- Discovery and documentation: At this point, you’re mostly doing research answering key questions. What are you making? Who is it for? What are the major specs? What does the competitive landscape look like? What is your system architecture?
- Works-like prototype: Here, you begin creating prototypes that may be insanely hacked together, but can articulate the function of the product and prove out the use of all selected components.
- Looks-like prototype: At this stage, you should know what needs to go inside your enclosures and the interaction points of the product. Designers and engineers work together to create the shape of the device, select desired manufacturing methods, and begin to refine the CMF (color, material, and finish) options.
- Integrated prototype: This is where the real fun (and work) happens. Custom circuit boards, prototype enclosures, and many iterations are created until all stakeholders are happy with the result.
- RFQ and DFM: It wouldn’t be an engineering project without acronyms! A request for quotation (RFQ) package is created and shared with all identified vendors to provide quotes for manufacturing the product. Typically, additional tweaks need to be made to ensure the design for manufacturing (DFM) is locked down.
- Manufacturing ramp: Once everything is hunky-dory, we start making ‘em. Small production runs help identify manufacturing issues and refine the assembly process. When we’re happy here, we can ramp up to mass production.
Electronics development process
The electronics and techniques chosen at each of these steps differ and get more and more specialized as the product is refined. The major leaps in development usually follow the process below.
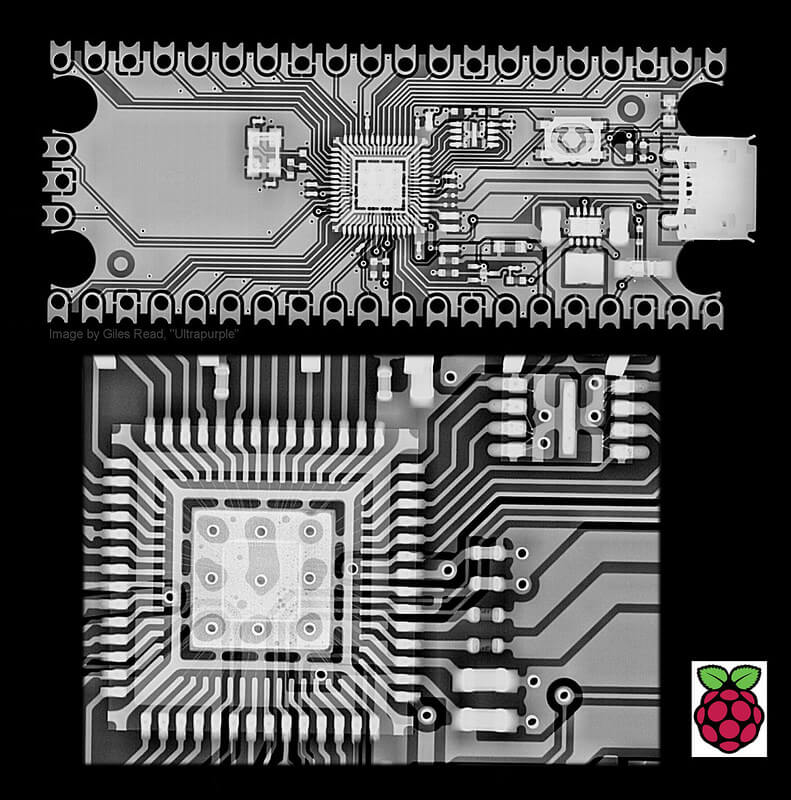
X-ray photo of a Raspberry Pi board by Giles Reed (Ultrapurple)
Development kits
As part of the first phase, an electrical engineer and firmware developer select the major components that build up the device.There are no shortages of options for microcontrollers, power management circuits, wireless radios, and even lights to choose from. Selections are typically made based on balancing availability, cost, performance, size, and ease of development.
Many component vendors sell development kits as a way to quickly build functional code on a preconfigured circuit board to ensure the selected component is a good fit. It’s not uncommon to walk into a hardware startup and see a rat’s nest of hookup wire connecting various development kits during the early stages of a product’s journey. Swapping in a new part later on can take precious time and introduce potential bugs in the firmware and hardware, so nailing these selections early on is crucial.
Chunky boards
Development kits are clunky and full of extra parts and features that may not be used by your product. Once the major components of your electronics are locked down, typically, an electrical engineer spins up a custom circuit board with all of the selected components laid out for easier development.
The firmware and electrical teams are all given the same copy of the board to work off of — ensuring component pinouts are identical and no bugs are blamed on bad jumper wire connections. Test points are added to the circuit board for easy debugging of circuitry, and DIP switches or jumpers are used to test various versions of a circuit. Getting chunky boards made is a great way to unblock firmware development while still allowing for some flexibility on peripheral component selection to occur in parallel.
Integrated prototype boards
After the industrial designers and mechanical engineers have met and hashed things out, a custom-shaped circuit board is typically required to fit inside the final enclosure. Electrical and mechanical engineers work together to select components like buttons, ports, sensors, and connectors and to determine their positions on the circuit board.
One of the most important dynamics you can have on your hardware team is between the electrical and mechanical engineer. If they despise each other, or are just ignorant of the work that the other does, you’re gonna have a bad time. A mechanical engineer often acts as the bridge between industrial design and the electrical engineer, while the electrical engineer acts as that bridge between firmware development and the physical world.
Once these circuit boards are completed, a handful of prototypes are typically ordered from a quick-turn PCB fabrication house. Many excellent options exist (we’ve been happy with JLCPCB and NexPCB), and you can have boards in hand in a matter of weeks, if not sooner.
At this stage, you can begin testing the product as a whole, with custom electronics inside custom enclosures. You’ll learn a ton here, so test often and document.
Iterations
In my 15ish years of making things, I’ve never seen a company one-and-done a circuit board or enclosure, and frankly, I’d be worried if someone claimed they did. Iterating on hardware is part of the process of making products. I usually earmark time for three to four housing iterations and two to three PCB iterations. Firmware developers are lucky because they can iterate indefinitely without needing to order new physical parts. We’re jealous of them.
Eventually, your team will either have a final design for the product or you run out of money (JK, but not really!). Don’t expedite each and every board spin here. Budget for more prototypes and more time than you may think. I’ve seen many companies crash and burn at this stage because of some wildly ambitious launch date that could’ve easily been moved to buy more breathing room. Please don’t do this.
Anyway, if everyone is happy with the prototypes, then you’re onto the real deal. We’re close, but not there yet!
Mass production boards
The final step in this process is to graduate from a prototype house to your final manufacturing partner. Sure, many of these prototype houses claim to be able to do production runs, but I wouldn’t take them up on it. They’re typically not tooled up for the long tail of manufacturing, testing, and ensuring components are available for a long period of time.
Your final partner should review your circuit board files and electrical bill of materials to ensure all components are available locally for the foreseeable future. They may recommend swapping the “jelly bean” components like resistors and capacitors over to their local variants to save some costs and lead times. Review all substitutions!
Then, get some final versions of the boards made. Circuit boards are created using insanely impressive machinery that can pick and place tiny electrical components faster than you can sneeze — but they can still make mistakes! These first boards help the factory learn the quirks of your particular board(s) and improve the manufacturing and inspection processes to ensure nothing slips through the cracks.
If you haven’t submitted your device for certification compliance testing, you should do so now. We recommend prescreen testing as soon as your hardware is locked down, and a full screening before you’re ready to launch.
Congrats! You now have hardware that’s ready to mass produce and you’ve made it through the ringer. If this seems daunting to you, hit us up and we can help guide you through the journey.
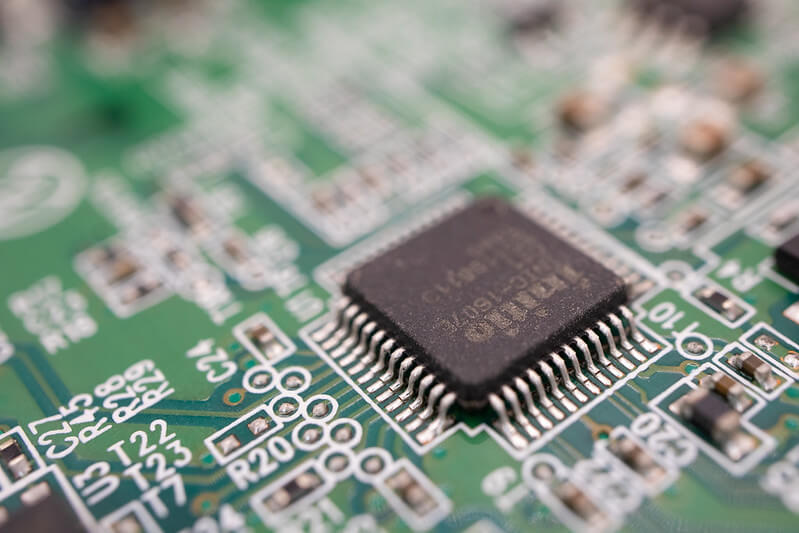
Circuit closeup by John Harvey (monkeyc.net)
TLDR
Was this too long and you didn’t read it all? I don’t blame you — social media has rotted our brains. Here are the major things to know:
- Start with development kits. They’re pretty inexpensive, have great documentation, and let you quickly determine which components to use. Be wary of fancy new components. Ensure you’re selecting the parts that fulfill the requirements of your product and are not only well supported but also well stocked.
- Make prototype boards to hand out to development teams. If all team members are developing on the same boards, it eliminates confusion and unblocks most firmware development.
- Mechanical engineers are your friends. Work with them on the tradeoffs of board size, component placement, and keepout zones to avoid costly mistakes later.
- Make prototype boards using prototype vendors, but be wary of rush-ordering everything. It’s expensive and can also burn your team out. It’s OK to not be in crunchtime all the time.
- It’s not uncommon to find issues. Iterate as needed. Test a final run with your factory before ramping up.
- Reach out for help early! We can rescue you from a bad situation. We’ve done it before and we’ll do it again.
informal is a freelance collective for the most talented independent professionals in hardware and hardtech. Whether you’re looking for a single contractor, a full-time employee, or an entire team of professionals to work on everything from product development to go-to-market, informal has the perfect collection of people for the job.